TUTORIALS
1 MAKING WATER WITH TIN FOIL
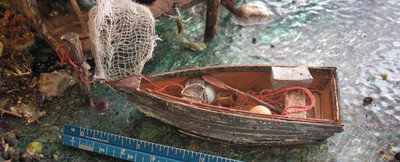
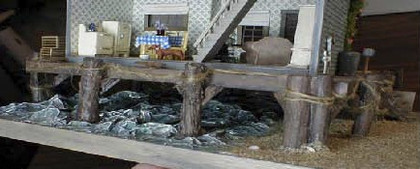
Some time ago I saw a wonderful water effect tutorial done by Karen Carey. I used it for my fishing shack scene and many people had asked how it was done. I contacted Karen who graciously gave me permission to copy her instructions and she provided the photographs as well. Her project was a Sea Shanty Kit and to the left is the water as I did it for my Fishing Shack scene.
Making water with Tin Foil
...These are the instructions that came with my Sea Shanty Kit ... I took a workshop from Mary Jean Emory at the Gulf Show in New Orleans in 2004 and she showed us how to make water with aluminum foil.
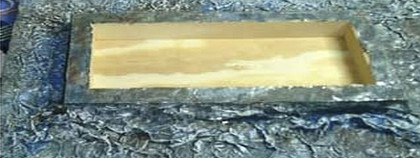
We used the heavy-duty foil. It was about 2-3" bigger on all 4 sides than the wood we glued it to. We were doing a large piece of wood about 12" x 15". For smaller pieces the foil doesn't have to be so much bigger and the thinner foil might work better on really small areas.
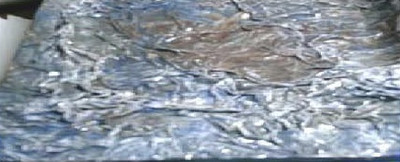
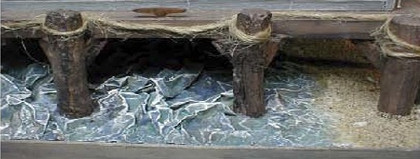
First we applied tacky glue very liberally to the entire wood piece. Then we put the foil on the wood shiny side up but we made sure the 4 edges of the foil were even with the 4 edges of the wood. Then we pressed the foil down in random places deliberately leaving part crinkled up to look like waves. It's hard to describe but try it on a small scale first and you'll see what I mean. I have attached some pictures of my water we made in Mary Jean's class. We let it dry and then we dry brushed paint over the foil. Using white, blue, and brown. You could also use green if you wanted greener water. After the paint dries you go back over the top parts where the foil is sticking up with more white to make it look like white caps.
Your Service Title Here
← You can delete an image by clicking the little 'x' located at the top right of the image.

2 QUARTER INCH SCALE CHAIR WITH CABRIOLE LEGS
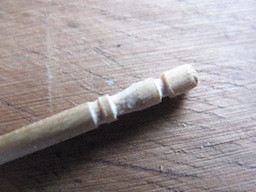
I looked at those little fancy toothpicks and thought the curves would work well for these legs and after I measured them they seemed just right. I kept them attached to the
toothpick as I worked.
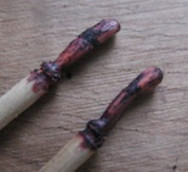 .
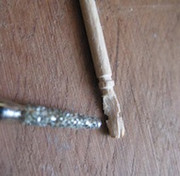
. I then shaped the front by slanting the very top back and using the narrow tip of the bit I softened the area above the “ball” foot. I used wood filler in that small area between the top part and the main curve.I then used a walnut color furniture pen to color it.
Chair:
Looking at a photograph of the chair I needed to make I decided to use egg carton foam (depron) in yellow for the chair seat and back. In the photograph the chair seemed to have some kind of pattern so I used orange Sharpie to emulate that.
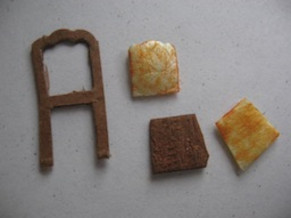
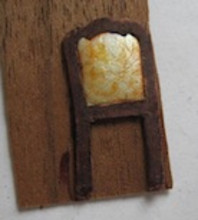
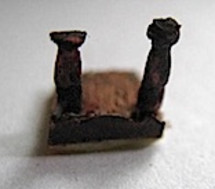
I glued the seat “cushion” to a thin piece of wood. The top part of the chair back was curved so I used a fancy scissors to cut the top. The next part was a bit tricky as I needed the “cushion” to be inset into the frame so I used brown file folder card doubled to shape that. A sharp x-acto and a round paper punch to work the curve worked out very well. That was then glued to a thin piece of veneer so the cushion back and the cardboard had more stability. I cut the whole thing out after it was glued. I also cut another thin piece of card with the fancy scissors for the skirting around the front wood part of the chair. I glued that to the chair seat and then used a drill bit twisted with my fingers to just barely make a small indentation in the wood of the chair bottom so the legs would sit well. Those were then glued in and the wood and card parts were all evened in color with that walnut marker.The seat was then glued to the back part and legs were carefully trimmed so the chair would stand properly. 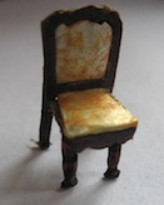 (I managed to cut the toothpick legs a bit unevenly.)There is a bit more I will do to this tomorrow after all the glue has set well. I need things to dry very quickly so I used a super glue, testing it on the foam first to be sure it wouldn’t melt the foam. Some do, some don’t.And here is the finished chair minus a few tweaks which will be added tomorrow.